Dépannage des paramètres de configuration d'adresse IP (Static Internet Protocol) sur FindIT Network Probe
Objectif
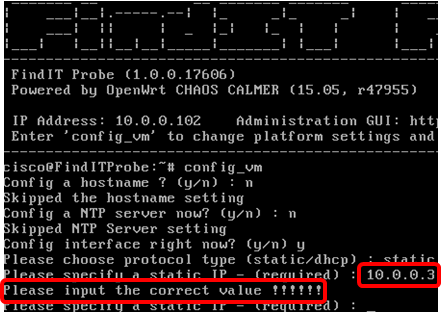
Une erreur récente s'est produite : lors de la configuration de la sonde FindIT Network, une adresse IP statique avec une seule valeur zéro dans au moins un des octets (par exemple 192.168.0.123 ou 10.0.0.3) via la console de la machine virtuelle a saisi la valeur correcte ! ! ! ! apparaît.
Scénario:
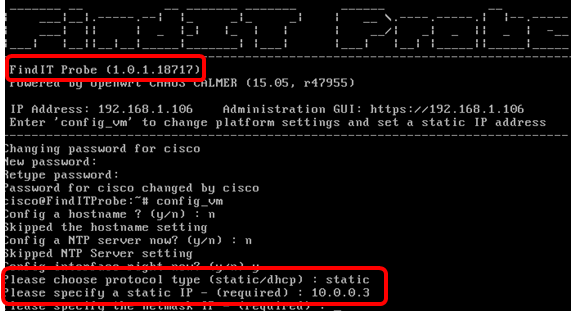
Le scénario ci-dessous met en évidence l'erreur lors de la tentative de configuration d'une adresse IP statique avec une valeur nulle dans les octets d'adresse IP. Lors de l'utilisation de la commande config_vm pour configurer l'adresse IP statique de la sonde de réseau FindIT, le message d'erreur s'affiche.
Solution 1 :
Solution n°2 :
Vous pouvez également affecter une adresse IP statique à la sonde via son interface utilisateur graphique d'administration. Cet article vous explique comment dépanner, définir et vérifier les paramètres de configuration IP statique de votre sonde FindIT Network.
Dépannage des paramètres de configuration IP statique sur FindIT Network Probe
Configuration de l'adresse IP statique sur la sonde
Étape 1. Accédez à la console de la machine virtuelle FindIT Network Probe (VM).
Étape 2. Connectez-vous à la console de VM, puis saisissez le nom d'utilisateur et le mot de passe. Le nom d'utilisateur et le mot de passe par défaut sont les suivants : cisco/cisco.

Note: Si vous avez modifié le mot de passe, saisissez le nouveau mot de passe à la place.
L'adresse IP DHCP et l'adresse de l'interface utilisateur de l'administration s'affichent.
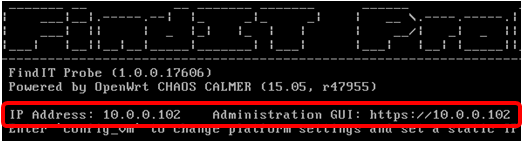
Note: Dans cet exemple, l'adresse IP de FindIT Network Probe est 10.0.0.102 et l'adresse de l'interface utilisateur d'administration est https://10.0.0.102.
Étape 3. Dans votre navigateur Web, saisissez l'adresse de l'interface utilisateur de l'administrateur de la sonde, puis appuyez sur Entrée.
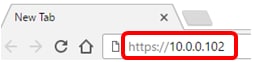
Note: Dans cet exemple, Google Chrome est utilisé.
Étape 4. Connectez-vous à l'interface utilisateur graphique d'administration à l'aide de votre nom d'utilisateur et de votre mot de passe. Le nom d'utilisateur et le mot de passe par défaut sont cisco/cisco.

Note: Si vous avez déjà modifié le mot de passe ou créé un nouveau compte, saisissez vos informations d'identification à la place.
Étape 5. Choisissez Administration > Platform Settings.

Étape 6. (Facultatif) Si vous souhaitez modifier le nom d'hôte de votre sonde, saisissez le nouveau nom d'hôte dans le champ Nom d'hôte. Le nom d'hôte est utilisé pour identifier la sonde lors de la génération de publicités Bonjour et de l'envoi de courrier.

Note: Dans cet exemple, FindITNetworkProbe est utilisé.
Étape 7. Dans la zone IP Settings, cliquez sur la case d'option Static IP.
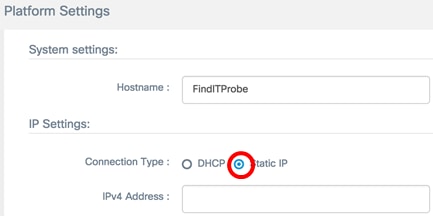
Les options sont les suivantes :
- DHCP : la sonde obtient automatiquement son adresse IP à partir du routeur. Voici la configuration par défaut .
- Static IP : vous pouvez configurer manuellement l'adresse IP, le masque de sous-réseau, les passerelles par défaut et les serveurs DNS.
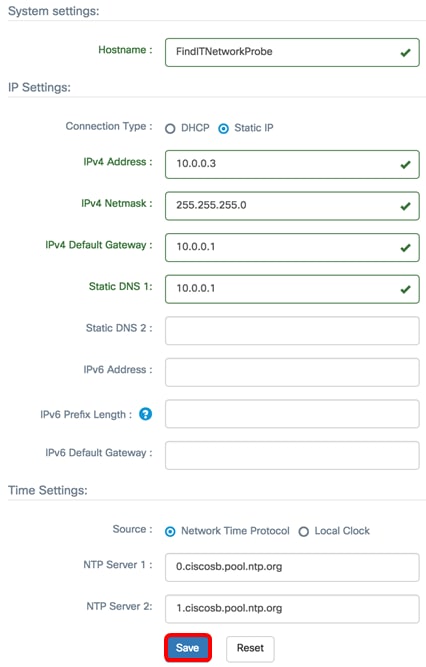
Étape 8. Entrez l'adresse IP statique de la sonde FindIT Network dans le champ IPv4 Address.

Note: Dans cet exemple, 10.0.03 est utilisé.
Étape 9. Entrez le masque de sous-réseau de votre réseau dans le champ Masque de réseau IPv4.

Note: Dans cet exemple, 255.255.255.0 est utilisé.
Étape 10. Entrez l'adresse de la passerelle par défaut dans le champ Passerelle par défaut IPv4.

Note: Dans cet exemple, 10.0.0.1 est utilisé.
Étape 11. Entrez l'adresse DNS statique dans le champ Static DNS 1.

Note: Dans cet exemple, 10.0.0.1 est utilisé.
Étape 12. (Facultatif) Saisissez une autre adresse DNS statique dans le champ Static DNS 2.
Étape 13. (Facultatif) Entrez l'adresse IPv6 statique dans le champ Adresse IPv6. Si vous ne souhaitez pas configurer les paramètres IPv6 de la sonde, passez à l'étape 18.
Étape 14. (Facultatif) Entrez la longueur du préfixe IPv6 dans le champ Longueur du préfixe IPv6. La vitesse est comprise entre 0 et 128.
Étape 15. (Facultatif) Entrez l'adresse de la passerelle par défaut IPv6 dans le champ Passerelle par défaut IPv6.
Étape 16. (Facultatif) Pour configurer les paramètres de temps de la sonde, sélectionnez une source temporelle. Les options sont les suivantes :
- Network Time Protocol : la sonde synchronise la date et l'heure avec le ou les serveurs NTP spécifiques. Voici la configuration par défaut .
- Local Clock : la sonde synchronise la date et l'heure en fonction de ce qui est défini sur l'ordinateur.
Étape 17. (Facultatif) Entrez le serveur NTP dans les champs Serveur NTP 1 et Serveur NTP 2.
Note: Pour savoir comment gérer les paramètres de plateforme de la sonde, cliquez ici pour obtenir des instructions.
Étape 18. Click Save.
Étape 19. (Facultatif) Cliquez sur le bouton Réinitialiser pour restaurer les paramètres précédents.
Étape 20. Une fois le message contextuel ci-dessous affiché, cliquez sur OK.
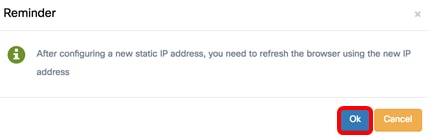
Vous devez maintenant avoir configuré les paramètres d'adresse IP statique sur votre sonde FindIT Network.
Vérifier l'adresse IP statique configurée sur la sonde
Il existe deux façons de vérifier que vous avez correctement configuré l'adresse IP statique de la sonde.
Étape 1. Dans votre navigateur Web, saisissez la nouvelle adresse de l'interface utilisateur graphique d'administration de la sonde, puis appuyez sur Entrée. Vous devez pouvoir accéder à l'interface utilisateur graphique Administration de la sonde FindIT Network.

Étape 2. Accédez à la console de la machine virtuelle FindIT Network Probe (VM) et connectez-vous à cette dernière. La nouvelle adresse IP et l'adresse de l'interface utilisateur de l'administration s'affichent.
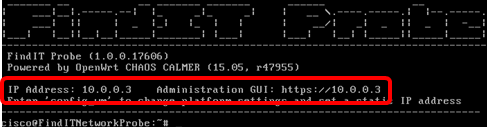
Vous devez maintenant avoir vérifié la nouvelle adresse IP statique de la sonde.
Afficher une vidéo relative à cet article...
 Commentaires
Contacter Cisco
- Ouvrir un dossier d’assistance

- (Un contrat de service de Cisco est requis)