Introduction
This document describes a specific install failure with vCenter 7.0U2 or higher with PCA and PCP.
Prerequisites
Requirements
Cisco recommends that you have knowledge of these topics:
- vCenter
- VMware
- Prime Collaboration Provisioning (PCP)
- Prime Collaboration Assurance (PCA)
Components Used
The information in this document is based on vCenter 7.0 U2 and PCA 12.1SP4.
The information in this document was created from the devices in a specific lab environment. All of the devices used in this document started with a cleared (default) configuration. If your network is live, ensure that you understand the potential impact of any command.
Problem
When installing PCA / PCP on vCenter 7.0SU2 or higher the deployment fails with certificate errors during the review details
These errors are not seen on vCenter 7.0SU2: Only seen on vCenter 7.0 and 7.0U1, installs on Center 7.0 and 7.0U1 work. if you click on ignore as shown in the image:
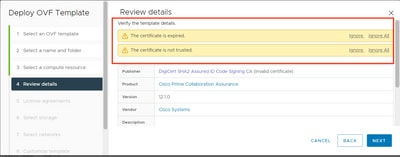
The error for vCenter 7.0U2 or higher; at which point the install fails with this certificate error is as shown in the image:
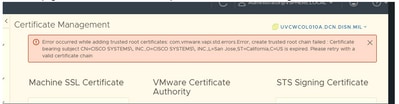
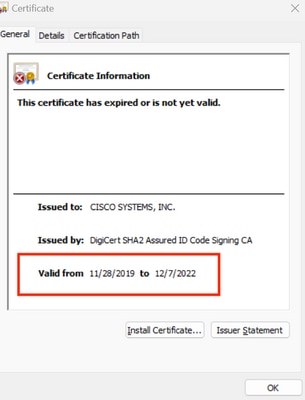
VMWare forums confirmed that this is correct for OVAs signed by expired certs in this VMWare KB Article.
Note: PCA 12.1SP4 certificate on the OVA is already expired as Cisco generated OVA in 2021

Both PCA and PCP End Of Life announcement:https://www.cisco.com/c/en/us/products/cloud-systems-management/prime-collaboration/eos-eol-notice-l...
Since both products are pastedEnd of SW Maintenance Releases, Cisco is not able to regenerate the OVA with a valid certificate.
Solution
Installation of PCA and PCP can be done with the Embedded ESXi Host Client.
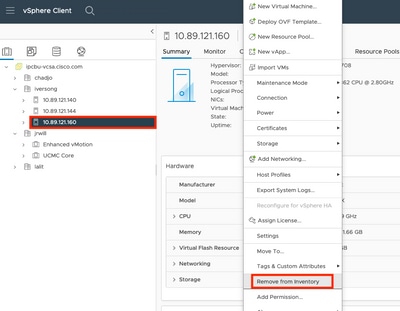
Step 1. From vCenter, find the host that PCA or PCP is installed on and click on that host. Via the Action Menu select Remove from Inventory as shown in the image.
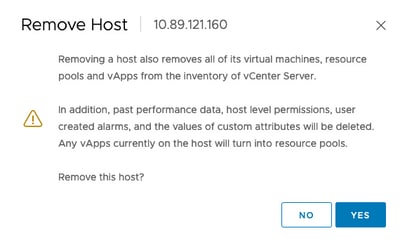
Step 2. Confirm you want to remove the host from the inventory by clicking on Yes as shown in the image.
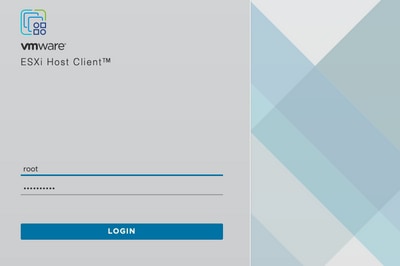
Step 3. Access the host you just removed in the previous steps that use the host IP Address, to access VMWare ESXi Host Clent, known as Emebbed Host Client as shown in the image.
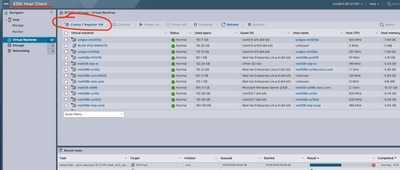
Step 4. In the left panel, click on Virtual Machines then click on Create / Register VM as shown in the image.
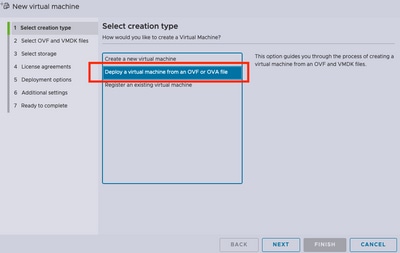
Step 5. Select Deploy a virtual machine from an OVF or OVA file then click Next as shown in the image.
Step 6: Proceed with the VMWare steps to create a new virtual machine. Once these steps are completed the PCA / PCP install starts. Watch the task list for installation to be completed.
Note: Do these steps after the installation has been completed.
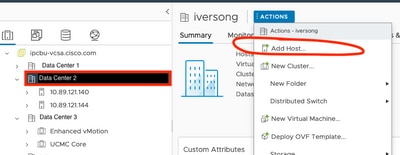
Step 7. How to add host back to vCenter.
Log in to vCenter, and find the data center in the left panel you want the host to be added to as shown in the image.
Step 8. Proceed with the VMWare vCenter steps to add the host.
Related Information
 Feedback